Friday, October 15, 2010

HERMS Brewery Finished

Finally, after months of building and waiting and assembling and waiting and waiting... you get the picture... I now have a fully functioning electric HERMS brewing system. Is it exactly as I pictured it? No... But does it work the way it should? Absolutely... It also challenges some of the preconceived theories on mash temperature stabilization (More on that later)

So what does the system comprise of?
3 Modified Kegs to act as Mash Tun, Hot Liquor Tank, and Boil Kettle
Photobucket
Photobucket
Photobucket

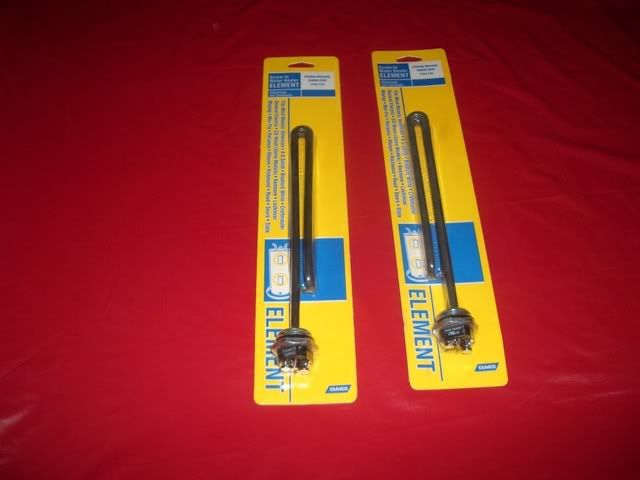
2 PID's with associated SSR's to control the 2 4,500 watt Heating elements in the HLT and BK all which reside in the Control Panel
Photobucket

1 March Pump
Photobucket

1 50ft Copper HERMS Coil
Photobucket

1 Stir Motor with mash paddle (soon to be adding a speed controller to this as well as another propeller for my HLT)
Photobucket

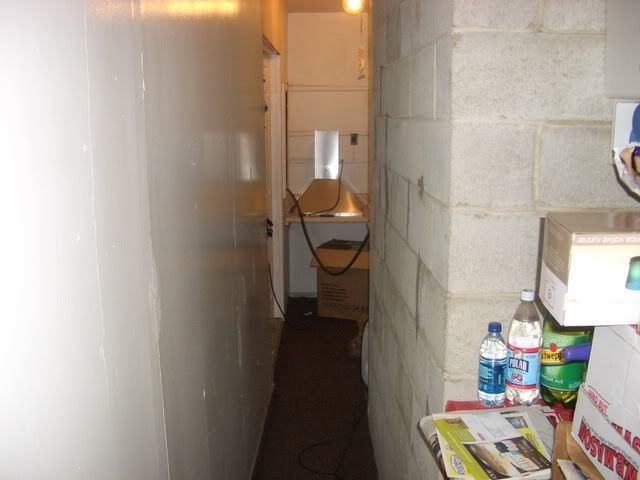
1 SS Hood System to vent steam out of the brew room and outside
Photobucket
Hood with flexible ducting

Also i noticed how small of a space it is to brew in after going through my first brew and realized I was setting a ton of my ingredients, measuring instruments and, miscellaneous equipment on the floor or in the gaps between the kettles, and this was really cluttering it up... So i installed 2 shelves to rest some equipment on... Still working on a long term solution for the stir motor:

Photobucket


Finally at the end of the brewday I was able to have my "Odds n' End's Lager" sitting happily in the fermenter bubbling away...
Photobucket

And after clean up, enjoyed a nice pint in my bar,

Bar Full View 2

And enjoy it in my man cave/theater... More to come on that...

LESSONS LEARNED

1. Need more ice for cooling to appropriate pitching temperatures
2. Constant stirring and recirculation of the mash results in more heating element use but also maintains the temperature the best.
3. cleaning is really easy with the utility sink next to the brewing set up as is having a direct water source within arm's reach.

Odds n' Ends Lager:

7.2# British Pilsener Malt
2.5# Crystal 40L
1.25# Toasted Malt
.25# Chocholate Malt

Sorachi Ace 14%AA
Tettnanger 4.4%AA

30mins .5oz SA
20mins .5oz T
15mins Whirfloc Tablet
10mins 1oz SA
1min .5 oz each of SA & T

Yeast Safale s-23
Aeration method: Shake and Aquarium pump with mini HEPA & Aeration Stone
Water adjusted to Munich profile


More to come when other equipemnt and modifications arrive...

Thursday, May 13, 2010

Jason Chmura's Home Brewing Chronicals: Going Electric... the Right way!

Jason Chmura's Home Brewing Chronicals: Going Electric... the Right way!

Going Electric... the Right way!

The New Electric Bow Tie Brewery Build
I have been considering the merits of going electric with my brewery for quite a while and after some close review of some threads online and some amazing help with a great man, Paul Muth, I was ready to take the dive into the potentially lethal brewing set up to make BETTER BEER!

Starting out I had to make sure that I had the correct tools, parts and wiring to accomplish the task:

Here is the room where the brewery will be housed: Nothing special its just my Mud room that really never is used... A perfect place for my brewery since it has a dryer outlet receptacle already there.

Already had a utility sink but it needed to be beefed up quite a bit: (More on that later)
Now there was the matter of the parts needed for this build... Rather than listing them all for a dual element set up, I'll just say that there are a lot of parts from many vendors as well as custom parts from Mr. Muth. Here are the ULWD Camco 4500w elements that will go inside of the BK and the HLT.

The control Box while looking like a rats nest of wires came out pretty good
Control Box Outside View 2

Control Box Inside View 2

Here is the first test run just powering up the PIDs and testing the outlets...
Its Alive!!! Muahahahaha

Success! It lives!!! One small issue... when I turn on the switch for the pump or the Motor both the pump and motor turn on and are not independent from one another... I'll have to look into that...
Photobucket

More on that later...

Now for the brew room... you saw that it was all disheveled and really no semblance of anything... well here's some more of that...

Through these doors... lies salvation... and good beer!
Through these doors...

Open Sesame!
... You will find salvation... and good beer!

Here is the unfinished stand for the kettles... Tile to go under that
The unfinished brewing table

The hood:
Photobucket

Mounted over the BK:
The hood set up over the BK

And the ducting:
Hood with flexible ducting

Thats all for now... more to come...


Sunday, February 7, 2010

First Brew of the New Year! 01/30/10

Brewed Beers: Nut Brown and Bohemian Pilsener

After a Long hiatus of not brewing since at least November, I decided to break out the brewing equipment on what was probably one of the coldest days of the year to date... I thought I'd be able to brew outside, but after about 3 minutes out there in full ski gear, face mask, and every other conceivable piece of cold weather gear, I conceded to move into the garage.

The brew day started at 8am with set up and run off through my new filtration set up... I can tell already with the first sample tastes that the filtered water has already improved the beer's overall bitterness levels. This is of course great news, so now those judges can't complain about the musty, taste they got in my last IIPA.

I wanted to stay pretty simple with the recipes and the additions so I stayed away from really measuring out my water additions... I actually was able to hit almost every target gravity that I set at 70% BHE for the final.

Here are the recipes (6gal):

Bohemian Pilsener
1.063OG
45 IBUs

13# Pils Malt

1.65oz Czech Saaz 60 Mins
2oz Czech Saaz 30 Mins
1oz Czech Saaz 10 Mins
1oz Czech Saaz 0 Mins

Wyeast Bohemian Pilsner

Nut Brown:
1.050OG
46.6 IBUs

10# 2-Row Pale Malt
.5# Crystal 60L
.5# Caravienne Malt
.25# Victory Malt
.25# Chocolate Malt

1oz Northern Brewer 60 Mins
1oz Willamette 5 Mins
1 Oz Willamette 1 Mins

Safale US-05

I did not use any whirfloc for any of these beers however i will absolutely be filtering the Pilsener. Its very cloudy in its primary stage as of right now.

I have done my Diacetyl rest for the beer and am getting ready to crash it at 37* for a while and then transfer off into a secondary for about 1-2 months of lagering at 34*. I am thinking about doing a Russian Imperial Stout pitched ontop of the pilsener yeast cake, however I'm unsure about that just yet... Maybe I'll do 2 CAP's instead...

I guess I need some recommendations.


I'll post pictures later

Tuesday, November 24, 2009

Thanksgiving Brew: The Nuts...

As we all have much to be thankful for this year, I will be making a simple but tasty brew with my good brewing partner Dan. We've teamed up on multiple occasions to brew some great beers and this Friday we will be really stepping it up to make an already great day into amazing one.

Nut Brown Ale
12 Gal Yield
1.055 SG

The Recipe:
Grain
22# 2 Row
1# Crystal 60L
1# CaraVienne Malt
.5# Victory Malt
.5# Chocolate Malt
Hops
1.5 oz Northern Brewer 9AA% @ 60 Minutes
2 oz Willamette 5AA% @ 5 Minutes
2 oz Willamette 5AA% @ 1 Minute
Yeas
t

Possibly split between Nottingham and S-04


Mash at 154*f for 60 minutes or till conversion

Pictures to come.

Thursday, November 12, 2009

Kolsch Transfer and Crash 11/11/09

Unfortunately no pictures of the actual transfer but I'll post up some pictures of the secondaries happily starting their one month stay in my chest freezer.
I used my first Better Bottle today, and I have to say that the weight savings really helps in the cleaning and moving departments. I quickly sanitized with Star-san and promptly racked my beer directly ontop of the foam... Hey don't fear the foam they say... so I'm not...

This beer is supposed to be made to the German purity laws, but depending on how clear my beer gets in the next couple days will really determine if I use some gelatin for fining or not. Either way it wouldn't be a detrimental addition to the beer if I did use it.

So here are the results:

After 12 days of Primary fermentation, the Kolsch achieved a Final Gravity of 1.011 which is exactly where it should have ended up based on the BJCP style guidelines.

From 1.051 to 1.011 in 12 days seems pretty good and especially based on the fermentation temps and yeast activity, I'd be willing to say that this was a textbook fermentation for a Kolsch.

The ABV will clock in right around 5.27%.

The taste right now is typical Kolsch however the Lagering period will really bring out that crisp clean taste that all Kolsch beers have. The yeast has thrown off a bit of that winey/sulfur character but I believe that with the one month of aging, this will be impercieveable in the nose.

I'll post some pictures up tonight of the secondaries happily sitting in my chest freezer at 33*F

Prosit!

Wednesday, November 11, 2009

Fighting a Cold comes with Inspiration for Brewing

I have recently been fighting a head cold and a pretty bad cough. When you are laying on the couch you find yourself always wanting a nice hot bowl of chicken soup or anything else to keep you comfortable and warm. Nice bold flavors that really put your mind and body at ease.
How does this fit into brewing beer? I'll tell you.

Originally I thought that my next few batches would all be Pilsner's because when I get home from work I usually like to reward myself with a beer that is easy and relaxing... That's probably why I went and brewed this recent Kolsch batch. However with the cold weather fast approaching here in New England, I thought about what I really like to enjoy; A nice scotch and a full bodied Cigar.

Nothing could bring me anywhere near this sensation that a great full bodied beer. Lately I feel like most of my brew's have been a little bit on the thin side, so to counter this I give you Denny Conn's Bourbon Vanilla Imperial Porter (BVIP)

I think in a few week's I'll brew this heavenly concotion. So many people have brewed this recipe and have hailed its praises over and over, so I must brew this for the season...

Here is the Recipe:

6 Gallon Batch

Grain:
11 Lbs 2-row
2.5 Lbs Munich 20L
1.5 Lbs Brown Malt
1 Lb Crystal/Caramel 120L
.5 Lb Crystal/Caramel 40L
.5 LB Chocolate Malt 350L


Hops:
.75 Oz Magnum @ 60 Minutes
1 Oz East Kent Goldings @ 10 Minutes

Yeast:
Wyeast American Ale 1056 3L starter

Extras:
Whirfloc Tablet
Vanilla Beans (2) in Secondary Scraped and quartered
Bourbon 2 oz per gallon

Mash in at 150-152*F
Mash out at 168*F

Ferment at 64*F